

Before you start
You need a Mac or a Windows machine. You do not need a Cloudflare account beforehand: if you do not have one, the app creates a free one in the same window during setup. Have somewhere safe in mind for a password, because that password is the owner credential for your brain, and you will use it to sign in from anywhere.
Download the app
Choose your platform and install.
macOS
Apple Silicon and Intel. Signed and notarized by Apple, so it opens with no security warnings.
Windows
64-bit Windows. Installers are code-signed, if you want to verify the publisher first.
Choose your platform. Installer links resolve to the latest GitHub release.
What you will see: Second Brain in your Applications folder on Mac, or your Start menu on Windows, ready to open.
Create your brain
The app walks you through setup in about two minutes:
Choose whether this brain is for you or for your team. Provisioning is identical; the team choice adds the team handoff and controls later.
Choose a password. This is the owner credential for your Second Brain, so keep it somewhere safe. On a team brain, members receive their own sign-in tokens later; do not give them the owner password.
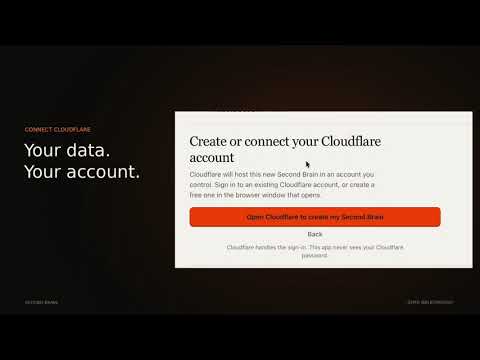
Sign in to Cloudflare, or create a free account in the same window.
The app builds your Second Brain in your own private Cloudflare account. It provisions everything a deployment needs: the Worker, the D1 database, the Vectorize index and the OAuth KV namespace.
It connects your AI tools for you: one click for Claude Code and Cursor, and copy-and-paste for ChatGPT and Claude on the web.
It shows you two links to keep:
- Dashboard
https://YOUR-WORKER-URL- AI connection
https://YOUR-WORKER-URL/mcp
What you will see: the app opens straight into your dashboard, already signed in. Your two links stay available afterwards from the menu bar or tray, under Connection details. A team setup also points you to the dashboard's Team tab to add members.
Because the app connects your AI tools during setup, you can skip the connecting guide on a first install. It is there whenever you want to add another client.
Already have a Second Brain?
Setting up a new computer, or you deployed with the button before? On the welcome screen choose Already have a Second Brain? and enter your address and password. The app connects that computer without changing or re-deploying anything. Logging out later, from the Connections menu or the Connection details window, forgets only that computer. Your brain and its memories stay put, and you can reconnect any time.
The do-it-yourself route: one-click deployment
If you would rather not use the app, the wiki still documents a one-click deployment that puts the Worker into your own Cloudflare account with a single button.
Generate a secure token first, with
openssl rand -base64 32, and save it somewhere safe. This becomes yourAUTH_TOKEN, the owner credential for the brain.Click the Deploy to Cloudflare button, on the repository's README or the wiki's Setup Guide page.
When Cloudflare shows the configuration form, enter your token, set
DIMENSIONto384, and setMETRICtocosine. These values must match the embedding model Second Brain uses, so do not change them.Deploy.
What you will see: Cloudflare copies the repository into your GitHub account, creates the D1 database, the Vectorize index and the OAuth KV namespace, configures the Worker bindings, stores your token as a secret, and deploys the Worker. No manual SQL and no resource setup.
Afterwards, open the Cloudflare dashboard and go to Workers and Pages, second-brain to find your Worker URL. It looks like https://second-brain.your-subdomain.workers.dev. Open that URL in a browser to reach your dashboard, and connect AI clients to the same URL plus /mcp.
There is also a manual install for developers who want full control: clone the repository, create the resources with the provided scripts, and run npm run deploy. The wiki carries every step.
The one-click button creates a standalone copy of the repository in your GitHub account, not a fork, so GitHub's Sync fork button never appears on it. That matters later, when you come to update.